Week 2: Project Management
This weeks assignment is to work trough a git tutorial and to build a personal website and tell something about myself and my plans for my final project.
Git Tutorial
.I've worked through a few Git tutorials, some of which I allready mentioned in Week 1. Another one is Git Tutorial for Beginners: Command Line Basics which tought me, well, the command line basics. The workflow I now use is
	cd jelka-lustenhouwer: to change the directory to my local folder that is connected to GitLab
	git pull: To check if changes have been made by someone else
	git status: To check what files are still untracked
	git add .: To add the files so git can track their history. If you use . you add all files. One can always add only one file by using the command add file.
	git commit -m "message": To commit the changes to GitLab. "Between the here you write what you edited"
	git push: With this the changes I made are visible on the website
One tutorial I find particularly informative is one on YouTube called GitLab University: Basics of Git and Gitlab. Maybe because it is obviously a Dutch guy doing the explaination and his accent is a balm to my cognitively overloaded brain. Anyway this is what I learned from Job the Dutch guy:
- To clone is to ask permission to collaborate on a project, to be alowed to pull a project.
- To commit is to add your changes to the history of a project.
- The purpose of GitLab is to collaborate on writing code. Instead of having one master version on a server, every one has her own version, including the complete history of a project. You can choose to merge with the version on the server or with a version of another collabrator.The advantage of Git and GitLab is version control. To have an overview of all the different versions in the history of the project, so for instance you are able to fix bugs or to pick up a branch of the project and develop a different version for a different purpose.
- To push is to add the changes you've made to your local version to your GitLab version.
- If you are the only person working on a project, you are ready after pushing your changes. If you are collaborating on a project you have to make a merge request to merge your changes to the master branch. At that moment GitLab will run a bunch of tests (I guess to prevent common bugs and mistakes) and the other collaborators can review the work that is done.
Build a website
From a colleague that was a Fab Academy student in 2015 I allready heard that one of the first assignments would be to build a website. So after summer I took my first steps in HTML and CSS. I learned a great deal from the book HTML and CSS for Dummies, written by Ed Tittle and Jeff Noble. I also followed a Udacity MOOC called Intro to HTML and CSS. I learned the very basics of the HTML and CSS language and working with boxes, borders and margins. I also learned a few nice tricks.
https://stackoverflow.com: For getting advice on common mistakes
https://validator.w3.org: checking your code for mistakes
https://necolas.github.10/normalize.css: to make your css code fit every browser
lorempixel.com: for demo pictures
google.com/fonts: for fonts
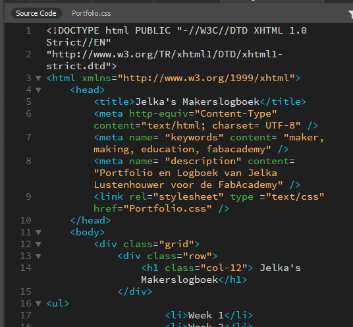
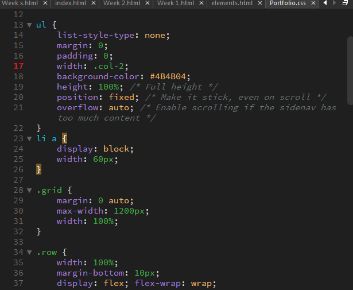
This is what my code looked like. To the left you see HTML and to the right CSS.
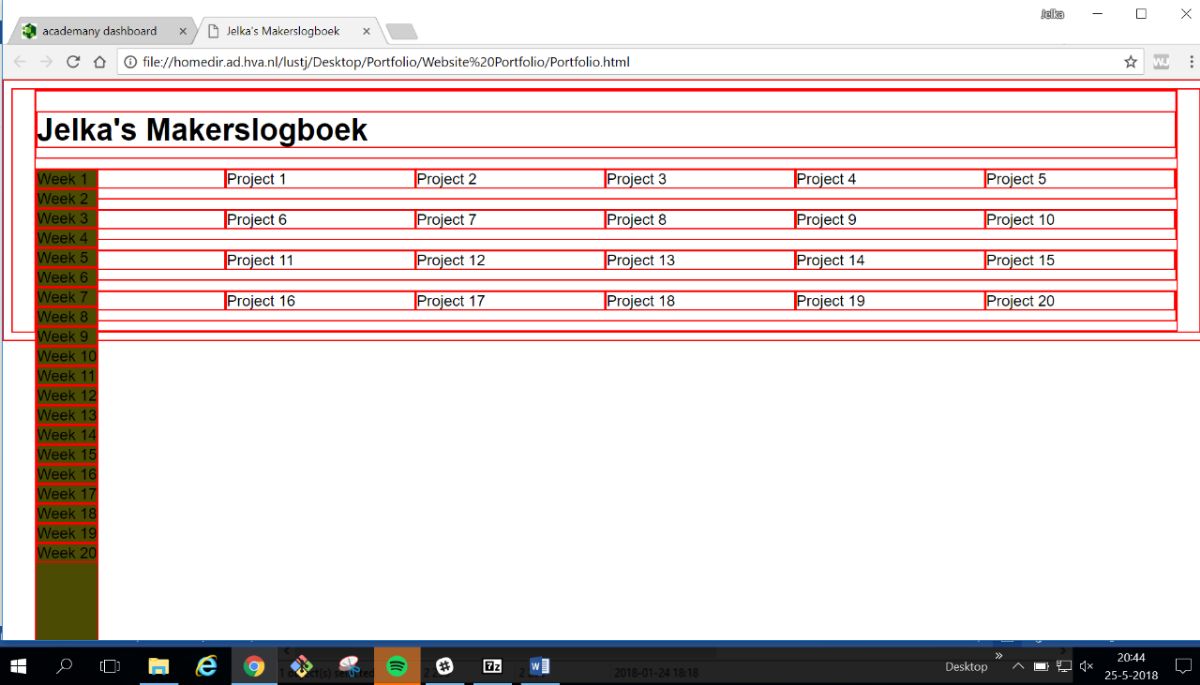
You can also look at the result here. It is far from beautiful, but I am actually proud it is responsive to screen size.
If you really want, you can download my files here: HTML and CSS learning documentsChoosing a Template
After a few weeks of learning and playing with HTML and CSS my work at HVA demanded its usual attention and time so I left my page in a quite a rudimental state. Turning my attention back to it last week, it became obvious that if I wanted to build a website from scratch I would have way more then a weeks work and still it would look pretty crappy. To my surprise one can find really neat templates online. For Free! So first I tried a template from Bootstrap called Album. I tried dowloading this to my local repository. But unfortunately it didn't work because it was very unclear which source code documents I had to download along. Then I tried the Template Phantom kindly provided by HTML5up.net.This is working really wel as you can see.
David gave a a tip to remove the silly crosses behind the coloured tiles in the template. His advice was to remove
display:block The ::after on the image is causing the lines - in the section below, removing the background image will remove the cross. It's up to you whether you want to keep anything else in the ::after or remove it background-image: url("data:image/svg+xml;charset=utf8,%3Csvg xmlns='http://www.w3.org/2000/svg' width='100' height='100' viewBox='0 0 100 100' preserveAspectRatio='none'%3E%3Cstyle%3Eline %7B stroke-width: 0.25px%3B stroke: %23ffffff%3B %7D%3C/style%3E%3Cline x1='0' y1='0' x2='100' y2='100' /%3E%3Cline x1='100' y1='0' x2='0' y2='100' /%3E%3C/svg%3E");and this worked.
As an editor I chose Dreamweaver. I have it running on my laptop and this is the editor I have been using since last summer. I love the split screen so I can work on my code and see what happens on the page at the same time. I also love the different colours for the code and that it tells me I forgot a tag. See the screenshot underneath
